Hello dear Amigurumi Knitting Lovers,Today we share a free amigurumi crochet pattern for you.
As you know, we share new amigurumi free patterns every day. master crochets, amigurumi gazelles, amigurumi bears, amigurumi pola, amigurumi pandas, amigurumi penguins, amigurumi giraffes, amigurumi lama, amigurumi pigs, amigurumi rabbit, amigurumi clowns, amigurumi dolls, amigurumi unicorn, amigurumi elephants, amigurumi unicorn , amigurumi hippos, amigurumi monkeys, amigurumi cats, amigurumi dogs and more…
Don’t forget to subscribe to receive notifications of our new free recipes.
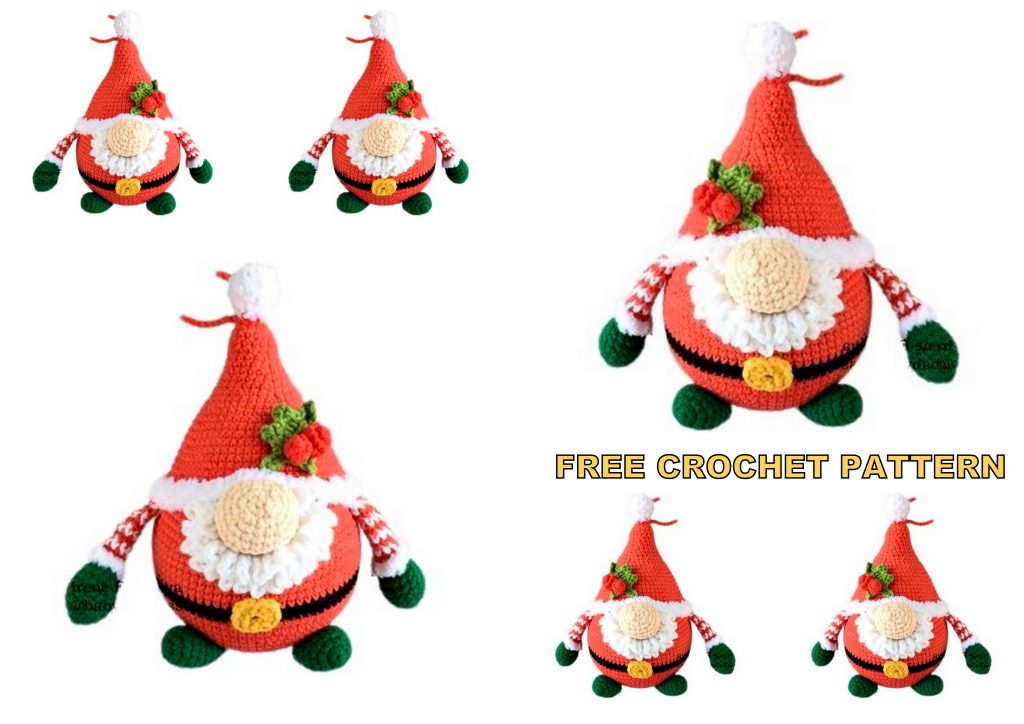
Today, the new daily crochet pattern Amigurumi Christmas Gnome Free Crochet Pattern, I want to give you some information about this pattern;


The required materials:
Yarn weight 50 gr / 160 m–I used Yarnart Jeans (55% cotton/45% acrylic; 160 m/50gr) of red (26 and 90), green (52and 69), black (53), yellow (35), white (01) and peach (73) colors;
Plush textured yarn for crochet border and pompom. I used Alize Softy;
2 mm crochet hook.
Stuffing material, fiberfill;
Tapestry needle for sewing the parts;
Scissors;
Stitch marker;
Pins;
Good mood
The yarn consumption:
red (26) – 25gr
a little bit of the other yarn – 5-10 gr
The finished product using the
materials described in this pattern is
~15 cm (5.9″).
Terms and abbreviations (US):
MR – magic ring
Sc – single crochet
Ch – chain
Inc – increase (2 stitches into one loop)
Dec – decrease (invisible)
BLO – back loops only
FLO – front loops only
[…] – work into one loop
P – picot stitch: 2 ch, sl st into the second stitch of the hook
HDC – half double crochet
DC – double crochet
«into the 2nd st from hook» – skip
the first stitch and start working into
the 2nd stitch from hook.
Row/rd – round
Sl st – slip stitch
T-ch – turning chain
Body
Row 1 – with red color yarn (26): 6 sc into MR (6)
Row 2 – 6 inc 12)
Row 3 – (1 sc, inc)6 (18)
Row 4 – (2 sc, inc)6 (24)
Row 5 – (3 sc, inc)6 (30)
Row 6 – (4 sc, inc)6 (36)
Row 7 – (5 sc, inc)6 (42)
Row 8 – (6 sc, inc)6 (48)
Row 9 – (7 sc, inc)6 (54)
Row 10 – (8 sc, inc)6 (60)
Row 11 – (9 sc, inc)6 (66)
Row 12 – (10 sc, inc)6 (72)
Row 13 – 72 sc (72)
Row 14 – (11 sc, inc)*6 (78)
Rows 15 – 16 – 78 sc (78)
Rows 17 – 18 – with black color yarn (53): 78 sc (78)

Cut and hide black yarn.
Rows 19 – 26 (8 rows) – 78 sc (78)
Row 27 – (11 sc, dec)6 (72)
Row 28 – 72 sc (72)
Row 29 – (10 sc, dec)6 (66)
Row 30 – (9 sc, dec)6 (60)
Row 31 – (8 sc, dec)6 (54)
Row 32 – (7 sc, dec)6 (48)
Row 33 – (6 sc, dec)6 (42)
Row 34 – (5 sc, dec)6 (36)
Row 35 – (4 sc, dec)6 (30)
Row 36 – (3 sc, dec)6 (24)
Row 37 – (2 sc, dec)6 (18)
Row 38 – (1sc, dec)*6 (12)
Row 39 – 6 dec (6)
Stuff the body gently. When stuffing, consider that the toy is intended as a decoration for the Christmas tree, and it should not be too heavy.
Cut yarn, and pull the hole with a needle. It is the upper part of the toy.

Arms
Row 1 – with green color yarn (52): 6 sc into MR (6)
Row 2 – 6 inc (12)
Row 3 – (2 sc, inc)4 (16)
Rows 4 – 6 (3 rows) – 16 sc (16)
Row 7 – (2 sc, dec)4 (12)
Row 8 – (1 sc, dec)*4 (8)
Row 9 – with white color yarn (01): BLO: 8 sc (8)
Cut green color yarn

Row 10 – with red color yarn (26): 8 sc (8)
Continue working each row alternating white and red colors. Make 6 rows. (11 – 16 rows).
Row 17 – with white color yarn (01): 8 sc (8)
Stuff the palm only.
Cut white yarn.
Switch to red color yarn. Fold the top of arm flat and work 3sc through both loops together.
Cut yarn, leaving a long tail for sewing.

Crochet border:
Work through FLO of the 9th row in sc with white color Alize Softy yarn. Hold arm with the palm up – 8 sc.

Legs
Row 1 – with green color yarn (52): 6 sc into MR (6)
Row 2 – 6 inc (12)
Row 3 – (2 sc, inc)4 (16)
Rows 4 – 7 (4 Rows) – 16 sc (16)
Row 8 – (2 sc, dec)4 (12)
Row 9 – (1 sc, dec)*4 (8)
Stuff with fiberfill gently.
Fold the top of the leg flat and work 3 sc through both loops together across.
Cut yarn, leaving a long tail for sewing.

Row 1 – with white color yarn Alize Softy: 6 sc into MR (6)
Row 2 – 6 inc (12)
Rows 3 – 4 – 12sc (12)
Row 5 – 6 dec (6)
Cut yarn.
Row 6 – with red color yarn (26): 6 sc (6)
Row 7 – (1 sc, inc)3 (9)
Row 8 – (2 sc, inc)3 (12)
Row 9 – (2 sc, inc)4 (16)
Rows 10 – 11– 16 sc (16)
Row 12 – (7 sc, inc)2 (18)
Row 13 – 18 sc (18)
Row 14 – (2 sc, inc)6 (24)
Row 15 – 24 sc (24)
Row 16 – (5 sc, inc)4 (28)
Row 17 – (6 sc, inc)4 (32)
Row 18 – (7 sc, inc)4 (36)
Row 19 – (5 sc, inc)6 (42)
Row 20 – 42 sc (42)
Row 21 – (6 sc, inc)6 (48)
Row 22 – (11 sc, inc)4 (52)
Row 23 – (12 sc, inc)4 (56)
Row 24 – (13 sc, inc)4 (60)
Rows 25 – 26 – 60 sc (60)
Row 27 – (9 sc, inc)6 (66)
Row 28 – 66 sc (66)
Row 29 – (10 sc, inc)6 (72) Cut yarn.
Row 30 – with white color yarn Alize Softy: (11 dc, inc)6 (78)
Cut yarn, leaving a long tail for sewing.
Stuff pompom and cap with fiberfill gently.

Belt buckle
With yellow color yarn (35)
Chain 8 and form a circle in sl st.
Work on the chain: ch, (inc sc, sl st)*4
You got a square piece.
Cut yarn, leaving a long tail for sewing.

Nose
With peach color yarn (73).
Row 1 – chain 3.
Start working into the 2ndst from hook inc, 3 sc into one loop, turn, and continue working on the other side of the chain 1 sc (6)
Row 2 – 6 inc (12)
Row 3 – (inc, 2 sc)4 (16)
Row 4 – (inc, 3 sc)4 (20)
Row 5 – (inc, 4 sc)4 (24)
Rows 6 – 7 – 24 sc (24)
Row 8 – (1 sc, dec)8 (16)
Cut yarn, leaving a long tail for sewing.
Stuff with fiberfill.

Beard
With white color yarn (01).
Rd 1 – chain 14.
Start working into the 2ndst from hook – 13 sc, turn (13)

Rd 2 – FLO: chain5, sl st into the 1 stst (i.e. into the last sc of the previous rd), (sc into the next st, chain 5, sl st into the same st, where you made sc)*12

Do not cut yarn. Turn to the wrong side and
find front loops of the 2nd rd:

Rd 3 – ch, BLO of the 2nd rd: (3 sc, inc)*3,
sc, turn (16)

Rd 4 – chain 5, sl st into the 1 stst from hook (i.e. into the last sc of the previous rd), (sc into the next st, chain 5, sl st into the same st where you worked sc)*15

Cut yarn, leaving a long tail for sewing.
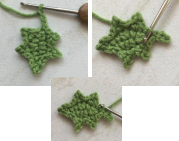
Holly leaf
With green color yarn (69).
Rd 1 – Chain 6.
Start working into the 2nd st from hook sc, sc, 2 HDC into 1 st, sc, sc, ch, turn and continue working on the other side of chain – sc, sc, 2 hdc into 1 st, sc, sc, sl st into ch of the beginning of this rd.

Rd 2 – sl st, [sc, p, sc], sl st, [sc, p, sc], 2 sl
st, [sc, p, sc] into ch of the previous rd, 2 sl
st, [sc, p, sc], sl st, [sc, p, sc], 2 sl st

Do not cut yarn. Continue working the petiole. Chain 3, and start working into the 2 nd st from hook – 2 sl st, sl st for security into the same st where you started crocheting the petiole.
Do not cut yarn. Start working the vein.
Crochet around the chain in sl st. Hold the working yarn from the wrong side. Insert hook from the right to the wrong side, grab yarn, draw it to the right side and make a sl st. Continue working similarly to the end of the chain.

Cut yarn, leaving a long tail for sewing.
Berries
With red color yarn (90).
Big berry
Row 1 – 6 sc into MR (6)
Row 2 – 6 inc (12)
Row 3 – 6 dec (6)
Stuff the berry with fiberfill. Cut yarn, leaving a long tail for sewing. Pull the hole with a needle.

Small berry
Row 1 – 4 sc into MR (4)
Row 2 – 4 inc (8)
Row 3 – 4 dec (4)
Stuff the berry with fiberfill. Cut yarn, leaving a long tail for sewing. Pull the hole with a needle
Assembly
Sew the belt buckle.

Sew the arms to the body between 27-28 rows. Attach the arms not straight, but slightly at an angle so
that the palms are turned forward.

Sew the legs to the 7thrnd of the body for 3 loops of the last rnd. The distance between the legs is 8 sc. Sew the leg to the body across the entire surface so that it does not tilt.

Sew the beard to the sides of the 29th row. Attach the nose. There should be no space between the nose and beard. The beard should fit snugly around the nose. Sew it.

Sew the leaves and berries to the cap.
Sew the cap so that it covers the top of the arms and nose.
Crochet the pendant for the tree:
Attach yarn to the back of the cap next to the pompom and chain 30, SL ST into the same loop.

FINISH