Hello dear Amigurumi Knitting Lovers
Today we share a free amigurumi crochet pattern for you. As you know, we share new amigurumi free patterns every day. master crochets, amigurumi gazelles, amigurumi bears, amigurumi pola, amigurumi pandas, amigurumi penguins, amigurumi giraffes, amigurumi lama, amigurumi pigs, amigurumi rabbit, amigurumi clowns, amigurumi dolls, amigurumi unicorn, amigurumi elephants, amigurumi unicorn , amigurumi hippos, amigurumi monkeys, amigurumi cats, amigurumi dogs and more…
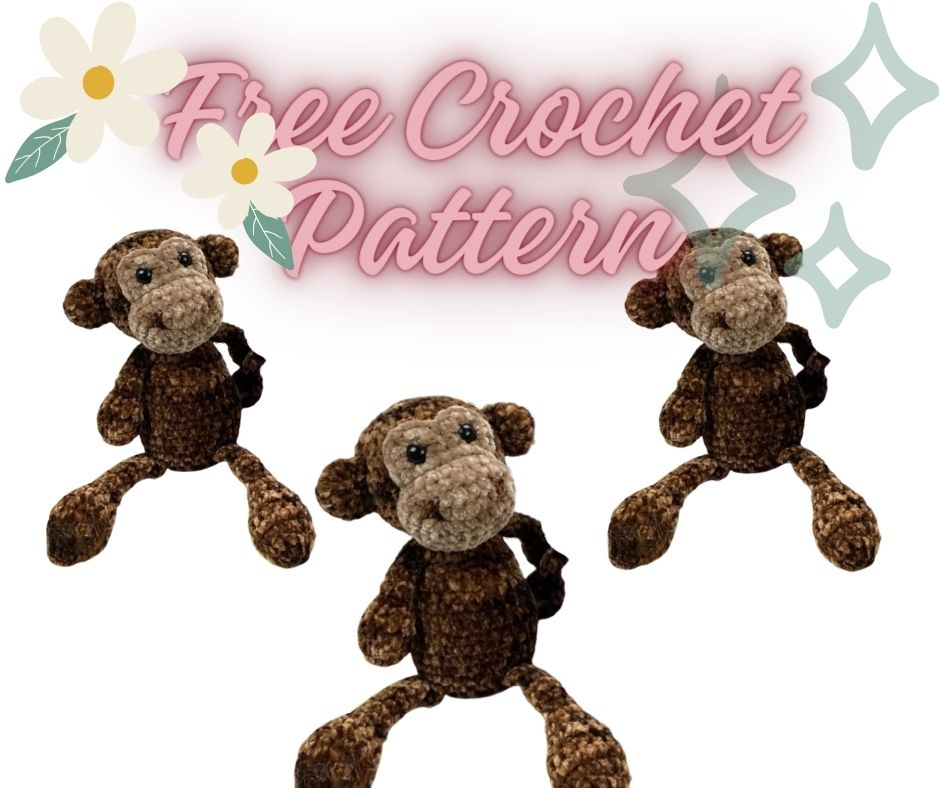
Today, the new daily crochet pattern Amigurumi, Flip-Flop Monkey Free Crochet Pattern , I want to give you some information about this pattern;
Materials:
Hook size 5.5 mm (I)
Main Colour – Bernat Crushed Velvet Coffee (or Ginger Plum) – 95 yards
Accent Colour – Bernat Velvet Mushroom small amount
- Polyester filling – small amount
- 2 – 12mm black safety eyes (not suitable for children under 3): see video for embroidering sleepy eye as an alternative.
- Stitch Markers or Safety pins to help with sewing placement
- Yarn needle to weave in the ends
Gauge:
4 Rounds of Gauge Pattern = 2.0 inch diameter
Gauge Pattern:
Create a Magic Ring
Round 1: 6sc in the ring (6)
Round 2: 2sc in each st (12)
Round 3: *sc, 2sc* 6 times (18)
Round 4: *sc in the next 2 sts, 2sc* 6 times (24)
Abbreviations:
| ch | chain |
| dc | double crochet |
| hdc | half double crochet |
| sc | single crochet |
| scdec | single crochet decrease |
| ss | slip stitch |
| st(s) | stich(es) |
| *to* | repeat the sequence between the ** the number of times indicated |
| YO | Yarn Over |
Notes:
- #sc, eg. (2sc, 3sc, etc) shows the number of scs to be completed in the indicated st
- Sts listed between brackets are all worked in the same st, eg. (hdc, dc)
- I highly recommend using a stitch marker to help keep track of the rounds for the body/head
- The pattern has both a ‘sew’ and no sew option for the limbs shown in the Body/Head section.
Arms (Make 2):
The arms are worked from the “hand” to the body, in continuous rounds.
Using Main Colour, create a Magic Ring
Round 1: 6sc in the ring (6)
Round 2: *2sc* 6 times (12)
Round 3-4: sc in each st (12)
Round 5: *sc in the next 2 sts, scdec* 3 times (9)
Round 6: *sc, scdec* 3 times (6)
Stuff only the ‘hand’ portion of the arm, the rest will be left unstuffed.
Rounds 7-12: sc in each st (6)
Flatten and sc through both sides.
End off leaving a 12 inch tail if sewing.
Legs (Make 2):
The legs are worked from the “foot” to the body, in continuous rounds.
Using Main Colour, create a Magic Ring
Round 1: 6sc in the ring (6)
Round 2: *2sc* 6 times (12)
Round 3: *sc in the next 3 sts, 2sc* 3 times (15)
Rounds 4-6: sc in each st (15)
Round 7: *sc in the next 3 sts, scdec* 3 times (12)
Round 8: *sc in the next st, scdec* 4 times (8)
Stuff only the ‘foot’ portion of the leg, the rest will be left unstuffed.
Rounds 9-16: sc in each st (8)
Flatten and sc through both sides.
End off, leaving a 12 inch tail if sewing.
Face:
The face is worked in rows from the bottom up.
Using Mushroom, ch 8
Row 1: sc in the 2nd ch from the hook, sc in the next 6 chs, ch1, turn (7)
Rows 2-4: sc in each st, ch1, turn (7)
Round 5: sc, 2dc, (dc, hdc) in same st, ss, (hdc, dc) in same st, 2dc, sc, continue to sc around the face until you reach the beginning of Round 5, join to the beginning of Round 5
End off, leaving an 18 inch tail for sewing
Muzzle:
The muzzle is worked from the tip back, in continuous oval rounds
Using Mushroom, ch 8
Round 1: sc in the 2nd ch from the hook, sc in the next 5 chs, 3sc in the last ch, turn and work in the bottom of the chains, sc in the next 5 chs, 2sc in the last ch (16).
Round 2: 2sc, sc in the next 5 sts, *2sc* 3 times, sc in the next 5 sts, *2sc* twice (22).
Round 3: sc, 2sc, sc in the next 5 sts, *sc, 2sc* 3 times, sc in the next 5 sts, *sc, 2sc* twice (28)
Round 4: sc in each st (28)
Round 5: *sc in the next 5 sts, scdec* 4 times (24).
End off, leaving an 18 inch tail for sewing
Body/Head:
The body and head are worked in one piece from the bottom up in continuous rounds.
Option 1: Sewing the Legs and Arms to the body
If you are sewing your legs and arms onto your body then ‘sc in each st’ for Round 6 and Round 21.
Option 2: Crochet Legs and Arms to the body
Using Main Colour, create a Magic Ring
Round 1: 6sc in the ring (6)
Round 2: *2sc* 6 times (12)
Round 3: *sc in the next st, 2sc* 6 times (18)
Round 4: *sc in the next 2 sts, 2sc* 6 times (24)
Round 5: *sc in the next 3 sts, 2sc* 6 times (30)
Round 6 Option 1: sc in each st (30)
Option 2: Hold your first leg in front of your work (body). Working through both pieces, sc in the next 4 sts, working through the body only, sc in the next 5 sts, Hold the second leg in front of your work (body). Working through both pieces, sc in the next 4 sts, working through the body only, sc in the last 17 sts (30).

Rounds 7-12: sc in each st (30)
Round 13: *sc in the next 3 sts, scdec* 6 times (24)
Rounds 14-16: sc in each st (24)
Note: You may want to begin stuffing
Round 17: *sc in the next 2 sts, scdec* 6 times (18)
Round 18-19: sc in each st (18)
Round 20: *sc in the next st, scdec* 6 times (12), end off, weave in end.
Round 21 Option 1: sc in each st (12)
Option 2: Place the animal down on a hard surface with the body face ‘up’ and the legs facing you. Locate the 3 centre front sts and mark them with a stitch marker (the arms will be placed on either side of these sts). Locate the far right marked st. Count over 3 sts to the right of it and attach your yarn to the body. (If left handed you will locate the left st and count over 3 sts to the left).
Place the first arm in front of the body to the right of the marked sts (left if you’re left handed). Working through both pieces (beginning with the first st of the arm and the stitch on the body you attached your yarn to), sc in the next 3 sts.
Working through the body only, sc in the next 3 sts (these are your marked sts). Place the second arm in front of your work (body). Working through both pieces, sc in the next 3 sts, working through the body only, sc in the last 3 sts (12).

Round 22: *sc in the next st, 2sc* 6 times (18)
Round 23: *sc in the next 2 sts, 2sc* 6 times (24)
Round 24: *sc in the next 3 sts, 2sc* 6 times (30)
Round 25: *sc in the next 4 sts, 2sc* 6 times (36)
Rounds 26-31: sc in each st (36)
Add safety eyes: Place the face onto the head. Add safety eyes through Row 4 of the face and Round 30 of the body/head approximately 4-5 sts apart, continue stuffing (face will be sewn on later)
Round 32: *sc in the next 4 sts, scdec* 6 times (30)
Round 33: *sc in the next 3 sts, scdec* 6 times (24)
Round 34: *sc in the next 2 sts, scdec* 6 times (18)
Finish stuffing
Round 35: *sc, scdec* 6 times (12)
Round 36: *scdec* 6 times (6)
End off leaving a 6 inch tail, cinch the last 6 sts together and weave in the end.
Ears: (Make 2 Of Each)
Made in continuous rounds beginning at the tip of the ear.
Using Main Colour, create a Magic Ring
Round 1: 6sc in the ring (6)
Round 2: *2sc* 6 times (12)
Rounds 3-4: sc in each st (12)
Round 5: *sc, scdec* 4 times (8)
Do not stuff, ss in the next st, flatten and sc through both sides. End off leaving 12 inch tail for sewing to the head.
Tail:
Made in continuous rounds beginning at the tip of the tail.
Using Main Colour, create a Magic Ring
Round 1: 6sc in the ring (6)
Round 2: *sc, 2sc* 3 times (9)
Rounds 3-20: sc in the next 3 sts, scdec, sc in the next 3 sts, 2sc (9)
Do not stuff, end off leaving a 9 inch tail for sewing.


