Hello dear Amigurumi Knitting Lovers
Today we share a free amigurumi crochet pattern for you. As you know, we share new amigurumi free patterns every day. master crochets, amigurumi gazelles, amigurumi bears, amigurumi pola, amigurumi pandas, amigurumi penguins, amigurumi giraffes, amigurumi lama, amigurumi pigs, amigurumi rabbit, amigurumi clowns, amigurumi dolls, amigurumi unicorn, amigurumi elephants, amigurumi unicorn , amigurumi hippos, amigurumi monkeys, amigurumi cats, amigurumi dogs and more…
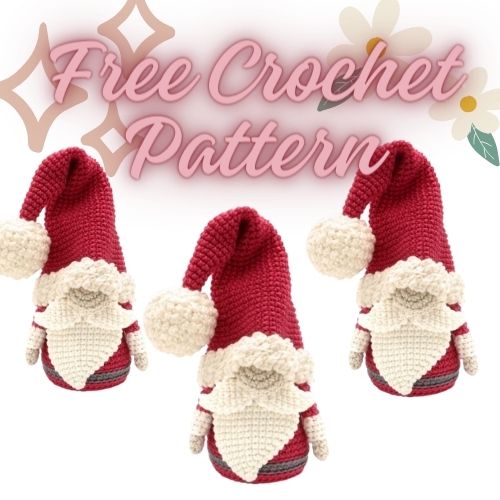
Today, the new daily crochet pattern Amigurumi, Christmas Gnome Crochet Pattern, I want to give you some information about this pattern;

Measurements
With the yarns used in this project, the doll measures
15 cm (5.9 inch) tall and 10 cm (3.9 inch) wide.
Materials

- 2.5 mm (US 1½) crochet hook
- tapestry needle
- stuffing, polyester fiberfill
- stitch marker
- scissors
- different colors yarn (see list below) for 2.5 mm
hook
Yarns used for this project:
holly berry: 1 x 50g Durable Coral, color 0221
charcoal: 1 x 50g Durable Coral, color 2236
linnen: 1 x 50g Durable Coral, color 2212
ivory: 1 x 50g Durable Coral, color 0326
Abbreviations
st(s) stitch(es)
ch chain
sc single crochet
dc double crochet
hdc half double crochet
tr triple or treble crochet
dtr double triple crochet
dec invisible decrease ( also known as sc2tog =
single crochet 2 stitches together)
inc increase
sl st slip stitch
blo back loop only
flo front loop only
rnd round
( ) the total number of stitches at the end of the
round are shown between round brackets (…)
[ ] repeat instructions between square brackets
[…] as many times as indicated in pattern
instructions
Body
n color C1 (holly berry) and C2 (charcoal) yarn.
The instructions preceded by C1 are made in color C1
(holly berry).
The instructions preceded by C2 are made in color C2
(charcoal).
Rnd 1 C1 start 6 sc in a magic ring (6)
Rnd 2 C1 [ inc ] x 6 (12)
Rnd 3 C1 [ sc 1, inc ] x 6 (18)
Rnd 4 C1 [ sc 1, inc, sc 1 ] x 6 (24)
Rnd 5 C1 [ sc 3, inc ] x 6 (30)
Rnd 6 C1 [ sc 2, inc, sc 2 ] x 6 (36)
Rnd 7 C1 [ sc 5, inc ] x 6 (42)
Rnd 8 C1 [ sc 3, inc, sc 3 ] x 6 (48)
Rnd 9 C1 blo 48 (48)
Rnd 10 C2 sl st 48 (48)
Rnd 11 C2 blo sc 48 (48)
Rnd 12 C1 sl st 48 (48)
Rnd 13 C1 [ blo 11, blo dec, blo 11 ] x 2 (46)
Rnd 14 C1 sc 46 (46)
Rnd 15 C1 [ sc 21, dec ] x 2 (44)
Rnd 16 C1 sc 44 (44)
Rnd 17 C1 [ sc 10, dec, sc 10 ] x 2 (42)
Rnd 18 C1 [ sc 19, dec ] x 2 (40)
Rnd 19 C1 sc 40 (40)
Rnd 20 C1 [ sc 9, dec, sc 9] x 2 (38)
Rnd 21 C1 [ sc 17, dec ] x 2 (36)
Rnd 22 C1 sc 36 (36)
Rnd 23 C1 [ sc 8, dec, sc 8 ] x 2 (34)
Rnd 24 C1 [ sc 15, dec ] x 2 (32)
Rnd 25 C1 [ sc 7, dec, sc 7 ] x 2 (30)
Rnd 26 C1 [ sc 13, dec ] x 2 (28)
Rnd 27 C1 [ sc 6, dec, sc 6 ] x 2 (26)
Rnd 28 C1 [ sc 11, dec ] x 2 (24)
Start stuffing the body and continue stuffing as you
progress.
Rnd 29 C1 [ sc 1, dec, sc 1 ] x 6 (18)
Rnd 30 C1 [ sc 1, dec ] x 6 (12)
Rnd 31 C1 [ dec ] x 6 (6)
Fasten off, sew the body closed and weave in the
ends.

NOTE:
To make the doll stand more easily, it is helpful to cut
out a disc of cardboard or plastic and place it inside
the body on the bottom. Cut the disc slightly smaller
than the size of the bottom so it will fit tightly.
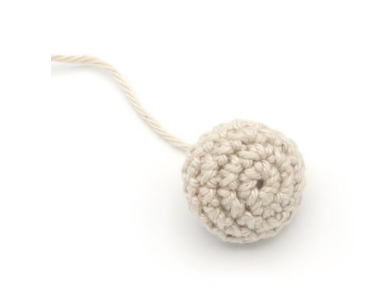
Hat
The pom pom and the hat are crocheted as one
piece, starting with the pom pom.
In color C1 (holly berry) and C4 (ivory) yarn.
The instructions preceded by C1 are made in color C1
(holly berry).
The instructions preceded by C4 are made in color C4
(ivory).
Rnd 1 C4 start 6 sc in a magic ring (6)
Rnd 2 C4 [blo inc ] x 6 (12)
Rnd 3 C4 [ blo sc 1, blo inc ] x 6 (18)
Rnd 4 C4 [ blo sc 1, blo inc, blo sc 1]
x 6 (24)
Rnd 5 C4 blo sc 24 (24)
Rnd 6 C4 blo sc 24 (24)
Rnd 7 C4 blo sc 24 (24)
Start stuffing the pom pom and continue stuffing as
you progress.
Rnd 8 C4 [ blo sc 1, blo dec, blo sc 1]
x 6 (18)
Rnd 9 C4 [ blo sc 1, blo dec ] x 6 (12)
Rnd 10 C4 [ blo dec ] x 6 (6)
Stop stuffing from now on.
Rnd 11 C1 sc 6 (6)
Rnd 12 C1 [ sc 1, inc, sc 1] x 2 (8)
Rnd 13-14 C1 sc 8 (8)
Rnd 15 C1 [ sc 3, inc ] x 2 (10)
Rnd 16-17 C1 sc 10 (10)
Rnd 18 C1 [ sc 2, inc, sc 2 ] x 2 (12)
Rnd 19-20 C1 sc 12 (12)
Rnd 21 C1 [ sc 5, inc ] x 2 (14)
Rnd 22-23 C1 sc 14 (14)
Rnd 44 C1 [ sc 3, inc, sc 3 ] x 2 (16)
Rnd 55-66 C1 sc 16 (16)
Rnd 27 C1 [ sc 7, inc ] x 2 (18)
Rnd 28-29 C1 sc 18 (18)
Rnd 30 C1 [ sc 5, inc ] x 3 (21)
Rnd 31-32 C1 sc 21 (21)
Rnd 33 C1 [ sc 3, inc, sc 3 ] x 3 (24)
Rnd 34-35 C1 sc 24 (24)
Rnd 36 C1 [ sc 7, inc ] x 3 (27)
Rnd 37-38 C1 sc 27 (27)
Rnd 39 C1 [ sc 4, inc, sc 4 ] x 3 (30)
Rnd 40-41 C1 sc 30 (30)
Rnd 42 C1 [ sc 9, inc ] x 3 (33)
Rnd 43 C1 sc 33 (33)
Rnd 44 C1 [ sc 5, inc, sc 5] x 3 (36)
Rnd 45 C1 sc 36 (36)
Rnd 46 C1 [ sc 11, inc ] x 3 (39)
Rnd 47 C1 sc 39 (39)
Rnd 48 C1 [ sc 6, inc, sc 6 ] x 3 (42)
Rnd 49 C1 sc 42 (42)
Rnd 50 C1 [ sc 13, inc ] x 3 (45)
Rnd 51 C1 sc 45 (45)
Rnd 52 C1 [ sc 7, inc, sc 7 ] x 3 (48)
Rnd 53 C1 [ sc 15, inc ] x 3 (51)
Rnd 54 C4 sc 51 (51)
Rnd 55-57 C4 blo sc 51 (51)
Do not fasten off and, we will continue to create the
fur effect on the border of the hat in the next section.

Hat Continued
Fur Border
The fur border is crocheted in the front loops of the
stitches created by doing the hat border in back loop
stitches only.
These front loops will be traversed in a slanted
manner as shown in the sketch on the next page.
Continue where you left of in the previous section:
ch 2, sl st in the following stitch, this is the start stitch
indicated in sketch on the next page (=stitch 1 of rnd
47)
From now on follow the trajectory as shown in the
sketch on the next page and do the following in each
front loop of the trajectory:
ch 2, sl st in following st (= next stitch in trajectory).
Work your way all around the hat, the trajectory
differs slightly at the end due to the transition of the
rounds
Pom Pom Fur
The fur on the pom pom is crocheted in the front
loops of the stitches created by making the pom pom
in back loop stitches only.
These front loops are traversed in reverse order as to
how they were created.
Join yarn of color C4 (ivory) in st 6 of rnd 10. As the
stitches are traversed in reverse order, the next stitch
is st 5 of rnd 10, then st 4 rnd 10 and so on.
In the every front loop in this trajectory do the
following:
ch2, sl st + ch1, sl st
Work your way to the end, fasten off and weave in
the ends.
Hat Continued

Nose
In color C3 (linnen) yarn:
Rnd 1 start 6 sc in a magic ring (6)
Rnd 2 [ inc ] x 6 (12)
Rnd 3 [ sc 1, inc ] x 6 (18)
Rnd 4-5 sc 18 (18)
Rnd 6 [ sc 1, dec ] x 6 (12)
Start stuffing the nose and continue stuffing as you
progress.
Rnd 7 [ dec ] x 6 (6)
Fasten off, sew the nose closed and leave a long tail
for sewing.
Arms 2x
In color C1 (holly berry) and C3 (linnen) yarn.
The instructions preceded by C1 are made in color C1
(holly berry).
The instructions preceded by C3 are made in color C3
(linnen).
Rnd 1 C3 start 5 sc in a magic ring (5)
Rnd 2 C3 [ inc ] x 5 (10)
Rnd 3-6 C3 sc 10 (10)
Rnd 7 C1 sc 10 (10)
Rnd 8 C1 blo sc 10 (10)
Rnd 9-16 C1 sc 10 (10)
Rnd 17 C1 [ dec ] x 5 (5)
Do not stuff the arm, fasten off and leave a long tail
for sewing.
Cuff
In color C4 (ivory) yarn:
Rnd 1 Start with the cuff at round 8.
Crochet in the front loops created
in round 8. Do this with the hand
facing away from you.
sc 10 (10)
Rnd 2-4 sc 10 (10)
Slip stich with following stitch. Fasten off and weave
in the ends.

Beard
In color C4 (ivory) yarn:
Rnd 1 start 4 sc in a magic ring (4)
Rnd 2 [ inc, sc 1 ] x 2 (6)
Rnd 3 inc, inc, sc 2, inc, sc 1 (9)
Rnd 4 sc 1, inc, inc, sc 5, inc (12)
Rnd 5 sc 2, inc, inc, sc 5, inc, sc 2 (15)
Rnd 6 sc 3, inc, inc, sc 9, inc (18)
Rnd 7 sc 4, inc, inc, sc 8, inc, sc 3 (21)
Rnd 8 sc 5, inc, inc, sc 14 (23)
Rnd 9 sc 6, inc, inc, sc 14, inc (26)
Rnd 10 sc 7, inc, inc, sc 17 (28)
Rnd 11-13 sc 28 (28)
Rnd 14 sc 8, dec, sc 16, dec (26)
Rnd 15 sc 26 (26)
Rnd 16 sc 8, dec, sc 11, dec, sc 3 (24)
Rnd 17-21 sc 24 (24)
sc 10, press the beard flat and crochet both sies
together using sc. Fasten off and leave a long tail for
sewing

Moustache x2
In color C4 (ivory) yarn:
Rnd 1 start 4 sc in a magic ring (4)
Rnd 2 [ inc, sc 1 ] x 2 (6)
Rnd 3 inc, inc, sc 4 (8)
Rnd 4 sc 1, inc, inc, sc 5 (10)
Rnd 5-8 sc 10 (10)
Rnd 9 dec x 5 (5)
Fasten off, sew the moustache closed and weave in
the ends.

Assembly
- Sew the beard to the body. The bottom of
the beard should just above the bottom of
the body.
(see images below) - Sew both moustache sides on top of the
beard.
(see images below) - Sew the top of the arms to the body so that
the bottom of the arms are slightly higher
located than the bottom of the beard
(see images below)
- Sew the nose just above the moustache.
(see images below) - Sew the hat onto the body: pull it partially
over the beard, the arms and the nose. Make
sure the hat molds over the nose tightly.
(see images on the next page) - Weave in the ends.
- Enjoy your new friend!