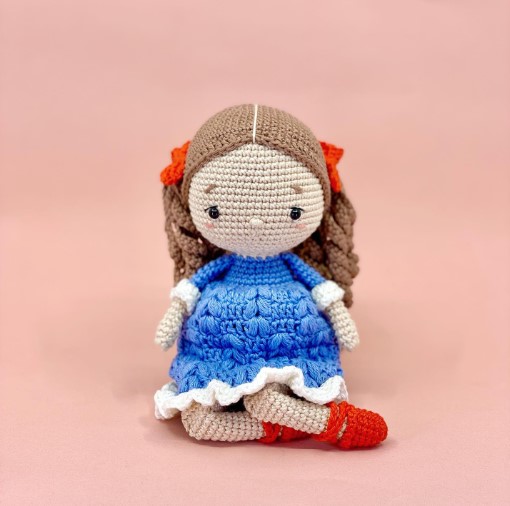
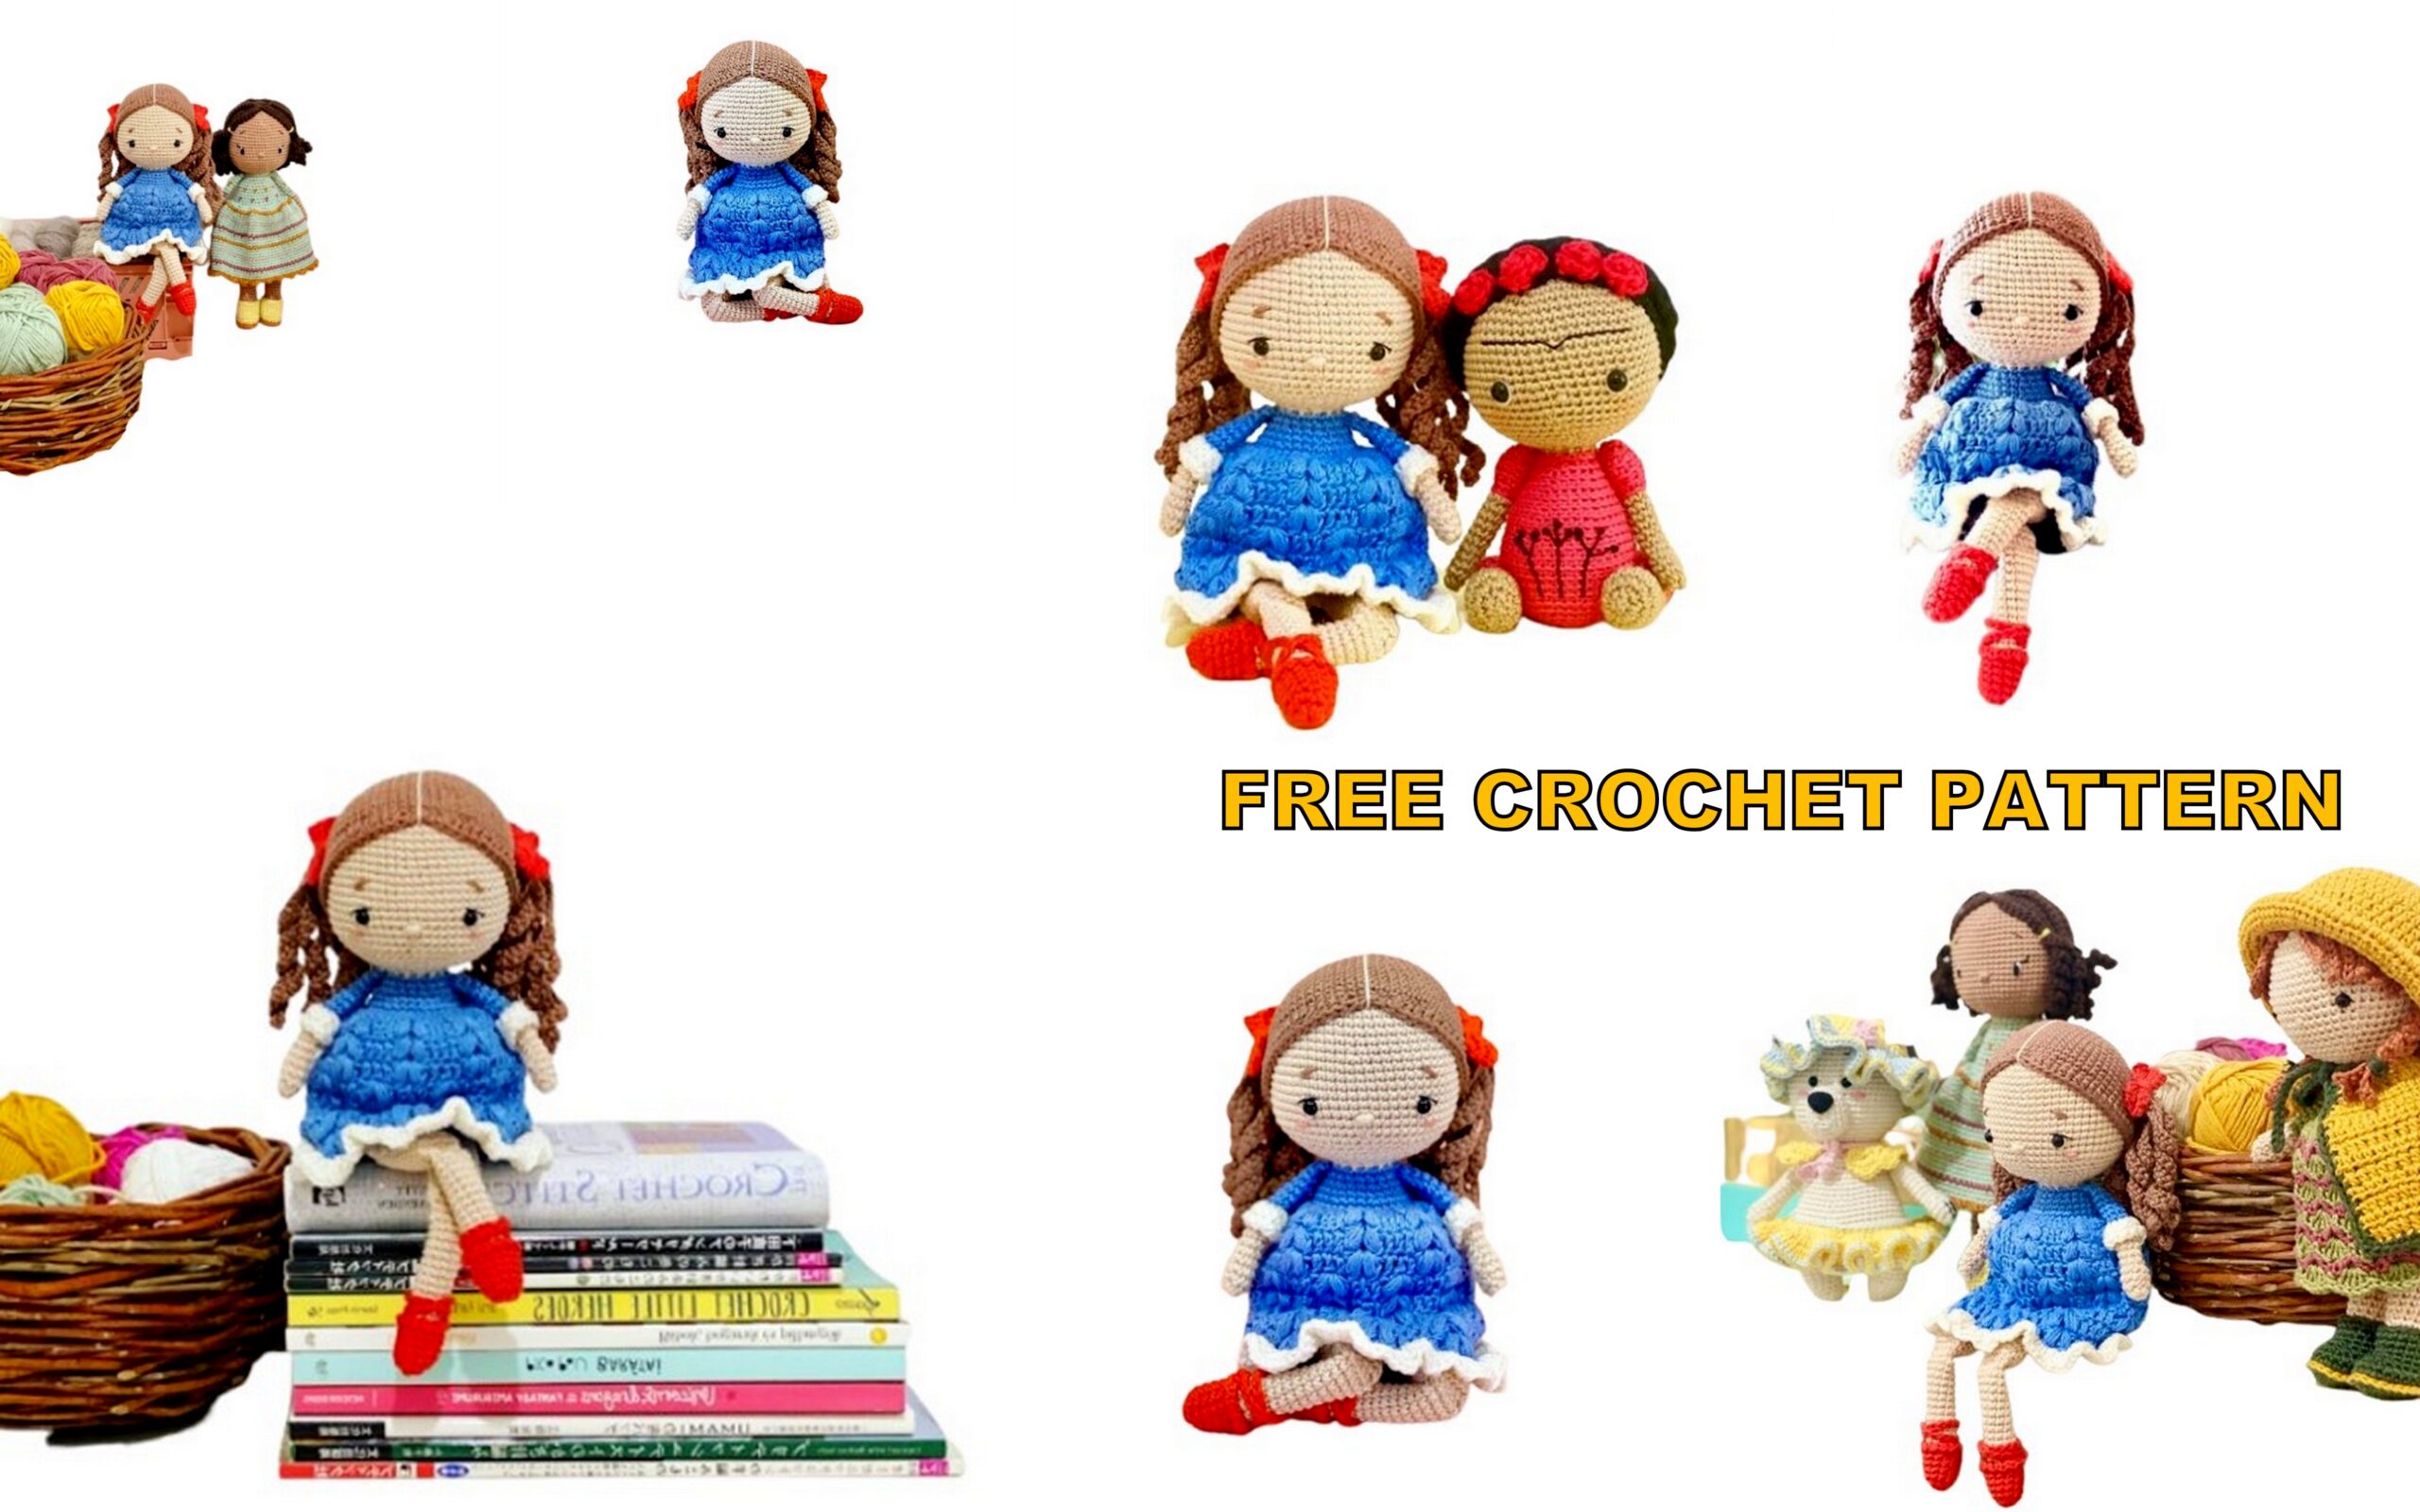
Hello dear Amigurumi Knitting Lovers,Today we share a free Amigurumi Mathilde Doll Free Crochet Pattern for you.
As you know, we share new amigurumi free patterns every day. master crochets, amigurumi gazelles, amigurumi bears, amigurumi pola, amigurumi pandas, amigurumi penguins, amigurumi giraffes, amigurumi lama, amigurumi pigs, amigurumi rabbit, amigurumi clowns, amigurumi dolls, amigurumi unicorn, amigurumi elephants, amigurumi unicorn , amigurumi hippos, amigurumi monkeys, amigurumi cats, amigurumi dogs and more…
Don’t forget to subscribe to receive notifications of our new free recipes.
Today, the new daily crochet pattern Amigurumi Mathilde Doll Free Crochet Pattern, I want to give you some information about this pattern;
Materials
2.5 mm – 1/B crochet hook
Tapestry or large sewing needle
Stitch marker (I use yarn)
Fiberfill stuffing
White, black and pink thread
6 mm safety eyes
Yarns
Schachenmayr Catania
Yarn A – 00436 Ivory
Yarn B – 00247 Sky
Yarn C – 00105 Natural
Yarn D – 00390 Tomato
Yarn E – 00437 Sun-kissed
Finished size and gauge
Yarns
Schachenmayr Catania
Yarn A – 00436 Ivory
Yarn B – 00247 Sky
Yarn C – 00105 Natural
Yarn D – 00390 Tomato
Yarn E – 00437 Sun-kissed
Mathilde is approximately 26 cm / 10 inches tall. Exact gauge is not necessary
for this project. Her measurements will change depending on the hook and
yarn you use. It’s important to crochet tight, to avoid the stuffing showing up
after filling.
Notes and abbreviations
The pattern is written in US American crochet terms. You will use these
stitches:
st = stitch
ch = chain
sl st = slip stitch
sc = single crochet
hdc = half double crochet
dc = double crochet
FLO = front loops only
BLO = back loops only
rep = repeat
inc = increase
dec = decrease
Invisible decrease: A method of decreasing. Insert hook into the front loop of
the next two stitches and pull a loop up through both. Yarn over and pull
through last two loops left on the hook.
X-shaped sc: using this method instead of the traditional V-shaped single
crochet, the stitches will be tighter, and the items will be slightly smaller. For
the doll and her accessories I used the X-shaped sc, but feel free to use the
traditional method if you prefer that.
Insert the hook under both loops of the previous stitch. Yarn under (hook the
yarn from above), pull through the loop and finish the stitch as usual
Puff st: Wrap the yarn over the hook and insert the hook into the next st. Yarn
over, and draw up a loop (3 loops on your hook). *Yarn over and insert your
hook through the same stitch, yarn over, and then draw up another loop (5
loops on your hook). Repeat from * one more time, now you have 7 loops on
your hook. Yarn over and draw the hook through 6 loops, now you have 2
loops remained on you hook. Yarn over, and draw the hook through the 2
loops. (see pictures 7-10)
The doll and her accessories are worked in continuous rounds unless
otherwise instructed ♡.
Head
With Yarn A
Rnd 1. 6 sc into magic ring (6)
Rnd 2. inc 6 times (12)
Rnd 3. {sc, inc} 6 times (18)
Rnd 4. {sc into 2, inc} 6 times (24)
Rnd 5. {sc into 3, inc} 6 times (30)
Rnd 6. sc into 2, inc, {sc into 4, inc} 5
times, sc into 2 (36)
Rnd 7. {sc into 5, inc} 6 times (42)
Rnd 8. sc into 3, inc, {sc into 6, inc} 5
times, sc into 3 (48)
Rnd 9. {sc into 7, inc} 6 times (54)
Rnd 10-14. sc into each (54)
Rnd 15. {sc into 8, inc} 6 times (60)
Rnd 16-24. sc into each (60) Place the
safety eyes between rounds 20 and
21, on the opposite side of the
starting stitch. Leave a distance of 12
stitches between them.
Rnd 25. {sc into 8, dec} 6 times (54)
Rnd 26. sc into 3, dec, {sc into 7, dec}
5 times, sc into 4 (48)
Rnd 27. {sc into 6, dec} 6 times (42)
Rnd 28. {sc into 4, dec} 7 times (35)
Rnd 29. {sc into 3, dec} 7 times (28)
Rnd 30. {sc into 2, dec} 7 times (21)
Rnd 31. {sc, dec} 7 times (14) Stuff the
head firmly.
Rnd 32. sc into each (14) Change to
Yarn B, and cont. with the body.
Body
Rnd 1. {sc, inc} 7 times (21)
Rnd 2. sc into each (21)
Rnd 3. {sc into 2, inc} 7 times (28)
Rnd 4. sc into each (28)
Rnd 5. {sc into 3, inc} 7 times (35)
Rnd 6. sc into each (35)
Rnd 7. sc into each BLO (35) Change
to Yarn A.
Rnd 8. {sc into 4, inc} 7 times (42)
Rnd 9-10. sc into each (42)
Rnd 11. {sc into 5, inc} 7 times (49)
Rnd 12-15. sc into each (49) Change
to Yarn C.
Rnd 16-19. sc into each (49)
Rnd 20. {sc into 5, dec} 7 times (42)
Rnd 21. {sc into 4, dec} 7 times (35)
Rnd 22. {sc into 3, dec} 7 times (28)
Rnd 23. {sc into 2, dec} 7 times (21)
Stuff the neck and continuously the
body.
Rnd 24. {sc, dec} 7 times (14)
Rnd 25. dec 7 times (7) Stuff the
body firmly. Fasten off, leave a long
tail, and close the small hole.
Weave the yarn into the body.

Embroidery
With Yarn A embroider the nose between rounds 21 and 22, 5-5 stitches from
the eyes. (Pictures 1-2) With white thread, embroider a line to the outer side of
the eyes, starting from the top of the eyes toward the bottom. (Pictures 3) With
black thread embroider eyelashes starting from next to the white thread
(between rounds 19 and 20), to inserting the needle between rounds 20 and
21, next to the eyes. (Pictures 4) With Yarn E, embroider eyebrows above the
eyes between rounds 16 and 18. (Pictures 5) With pink thread, embroider
blush between rounds 22 and 23. With Yarn A, embroider bellybutton
between rounds 14 and 15 of the body, the same way you embroidered the
nose.
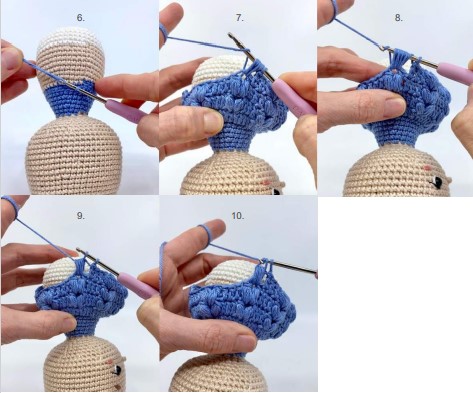
Skirt
Crochet the skirt in continuous rounds, but join with a sl st to the first st at the
end of each round. Ch 2 at the beginning of rounds 1-4, and 8-10 doesn’t
count as a dc. Turn the doll upside down and with Yarn B, join with a sl st to a
front loop of round 6 of the body, in the middle of the back of the doll (Pictures
6), crochet ch 2, and cont. with the pattern:
Rnd 1. {2 dc into next, dc into next} 17 times, 1 dc into last. (52) ch 2
Rnd 2. {dc into next 3, skip 1 st, [puff st, ch 1, puff st] into next, skip 1 st} 8
times, dc into next 4. (28 dc, 8×2 puff stitch) ch 2
Rnd 3-4. {dc into next 3, skip 1 st, [puff st, ch 1, puff st] into the prev round’s
ch 1 space (between the puff stitches), skip 1 st} 8 times, dc into next 4. (28 dc,
8×2 puff stitch) (Pictures 7-10)

Rnd 5. ch 3, {skip 1 st, [puff st, ch 1, puff st] into the next dc, skip 1 st, dc into
the prev round’s puff st, dc into the ch 1 space, dc into the next puff st} 8
times, skip 1 st, [puff st, ch 1, puff st] into the next dc, skip 1 st, dc into the last
st. (26 dc, 9×2 puff stitch) Join with a sl st to the 3rd ch of ch 3 (at the beginning
of the round). (Pictures 11-13)
Rnd 6-7. ch 3, {skip 1 st, [puff st, ch 1, puff st] into the prev round’s ch 1 space,
skip 1 st, dc into next 3 st} 8 times, skip 1 st, [puff st, ch 1, puff st] into the prev
round’s ch 1 space, skip 1 st, dc into the last st. (26 dc, 9×2 puff stitch) Join with
a sl st to the 3rd ch of ch 3, ch 2.
Rnd 8. {dc into the prev round’s puff st, dc into the ch 1 space, dc into the next
puff st, skip 1 st, [puff st, ch 1, puff st] into the next st, skip 1 st} 8 times, skip 1
st, dc into the prev round’s puff st, dc into the ch 1 space, dc into the next puff
st, dc into the last st. (28 dc, 8×2 puff stitch) ch 2
Rnd 9-10. Rep round 3. Change to yarn C.
Rnd 11. 3 dc into each dc, puff st and ch 1 space all along. Fasten off, and
weave the end into the skirt

Arms
Start with Yarn A, make two
Rnd 1. 6 sc into mr (6)
Rnd 2. {sc into next, inc} 3 times (9)
Rnd 3-4. sc into each (9)
Rnd 5. {sc into 2, dec} 2 times, sc into last (7)
Rnd 6-9. sc into each (7) Change to Yarn B
Rnd 10. sc into each (7)
Rnd 11. sc into each BLO (7)
Rnd 12-17. sc into each (7) Flatten the arms, and with 3 sc, crochet together
the sides. (Pictures 14) Fasten off, and leave a long tail for sewing.
With Yarn C, join with a sl st to a front loop of round 10, ch 2, and cont. with
the pattern:
Rnd 1. {dc into next, 2 dc into next} 3 times, 2 dc into the last st (11) (Pictures
15)
Rnd 2. {sl st into next, ch 1} 11 times (11 sl st, 11 ch) Join with a sl st to the first
sl st of the round. Fasten off, weave the end. Sew the arms onto both sides of
the body between rounds 1 and 2. (Pictures 16)


Legs
Start with Yarn A, make two
Rnd 1. 6 sc into mr (6)
Rnd 2. {sc into next, inc} 3 times (9)
Rnd 3-6. sc into each (9)
Rnd 7. inc, sc into 8 (10)
Rnd 8-12. sc into each (9)
Rnd 13. inc, sc into 9 (11)
Rnd 14-17. sc into each (11) Stuff the leg, then flatten the opening. With 5 sc
crochet together the sides. (Pictures 17) Do not fasten off, cont. with the upper
part of the leg by crocheting into the front loops of the 5 sc.
Rnd 1. ch 1, start crocheting into the first front loop on the left: inc, sc into 3,
inc, cont. crocheting into the other loops (of the 5 sc), inc, sc into 3, inc (14)
Replace the stitch marker. (Pictures 18-19)
Rnd 2-14. sc into each (14) Change to Yarn C
Rnd 15-17. sc into each (14) Crochet continuously 1 sc into the next 3 st, to
reach the side of the leg. Stuff the upper part of the leg slightly. Flatten the
opening, and with 6 sc, crochet together the sides. (Pictures 20) Make sure the
6 sc is in line with the 5 sc (which divides the upper and the lower parts of the
leg). Fasten off, and leave a long tail for sewing


Shoes
With yarn D, make two
Rnd 1. 6 sc into mr (6)
Rnd 2. inc 6 times (12)
Rnd 3-6. sc into each (12)
Rnd 7. {sl st into next, ch 1} 12 times. Join
with a sl st to the first sl st, and crochet ch
- Fasten off, and leave a long tail. Place
the shoe onto the leg, cross the strap in
the front of the leg to shape an X, and
sew the end of the strap next to the
starting point of it, at the back of the
shoe. With small stitches sew the shoe
onto the leg as well. (Pictures 21-22)
Sew the legs onto the bottom of the doll
between rounds 21 and 22. Sew them in
a straight line next to each other, onto
the front part of the doll. (Pictures 23-24


Hair
With Yarn E
Rnd 1. 6 sc into magic ring (6)
Rnd 2. inc 6 times (12)
Rnd 3. {sc, inc} 6 times (18)
Rnd 4. {sc into 2, inc} 6 times (24)
Rnd 5. {sc into 3, inc} 6 times (30)
Rnd 6. {sc into 4, inc} 6 times (36)
Rnd 7. {sc into 5, inc} 6 times (42)
Rnd 8. {sc into 6, inc} 6 times (48)
Rnd 9. {sc into 7, inc} 6 times (54)
Rnd 10-11. sc into each (54)
Rnd 12. {sc into 8, inc} 6 times (60)
Rnd 13-19. sc into each (60)
Rnd 20. hdc into next 28, sc into
next, sl st into next 2, sc into next,
hdc into next 28 (56 hdc, 2 sc, 2 sl st)
Fasten off, and leave a long tail for
sewing. Place the wig onto the head,
and sew it onto its place. The 2 sl st
marks the middle of the hair on the
front, make sure it’s in line with the
nose. With Yarn A embroider a
straight line
starting from where the middle of
the hair meets the head, into the
magic ring of the hair. (Pictures 25-26)
Ponytail
With Yarn E, make 2
*Ch 30, sc into the 2nd ch from the
hook, and the next 28 st (29) Repeat
from * 8 times. Fasten off, and leave
a long tail. Roll up the top part of the
8 locks, and secure it with a few
stitches. Sew them onto the wig on
both sides, between rounds 13 and
- (Pictures 27-30)
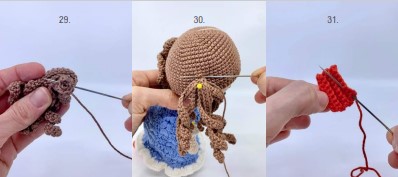

Bow
With Yarn D, make 2. Work in rows,
turn the piece at the end of each
row.
Row 1. Ch 9, sc into the 2nd ch from
hook, and the next 7. (8) ch 1, turn
Row 2-4. sc into each BLO (8) ch 1,
turn.
Fasten off, and leave a long tail.
Insert a needle with the tail through
the top loops of the bow until you
reach the middle of it. Roll the tail
over the bow a couple of times to
have a nice middle, secure it, and
place them onto the top of the
ponytails. Roll the tail over the
ponytails, and sew them properly
onto their places. (Pictures 31-33


Amigurumi Mathilde Doll Free Crochet Patterns
If you’re looking for free crochet patterns for Amigurumi Mathilde Doll, you’ve come to the right place. Many of these adorable creatures come with detailed instructions and step-by-step pictures. This particular pattern will teach you how to make a sweet little dancer that will be a great gift for a young girl or woman. It’s sure to be a cherished heirloom.
The pattern can also be purchased. It’s available on Ravelry. The doll will be 30 cm tall. The doll’s head and arms can be positioned to look different ways depending on the pattern. It also comes with a crochet hook and a needle.
The pattern also includes instructions for making the dress, which can be customized to fit the recipient. The pattern includes two designs: a ruffled dress and a plain dress. It’s easy to customize your doll’s outfit with a variety of colors.
This pattern comes with detailed instructions and pictures. It’s recommended for beginners and advanced amigurumi crafters. The instructions also include a materials list and hints and tips to help you finish the project. This pattern is free for personal use. However, if you choose to sell the finished item, you must give credit to the original designer.
When you finish the crochet piece, you can sew it together without using any fabric stabilizer. Start with the front panel and work your way around the sides and bottom. You can use pins to align the pieces if you’d like. The right side will be facing out.